Shoppe News and “Half-baked” Art Journals

My goal of finishing up “half-baked” art journals is well on it’s way.

I’m one of those people that gets super inspired, then wants to jump in before I loose my momentum, leaving partially finished projects in my wake.

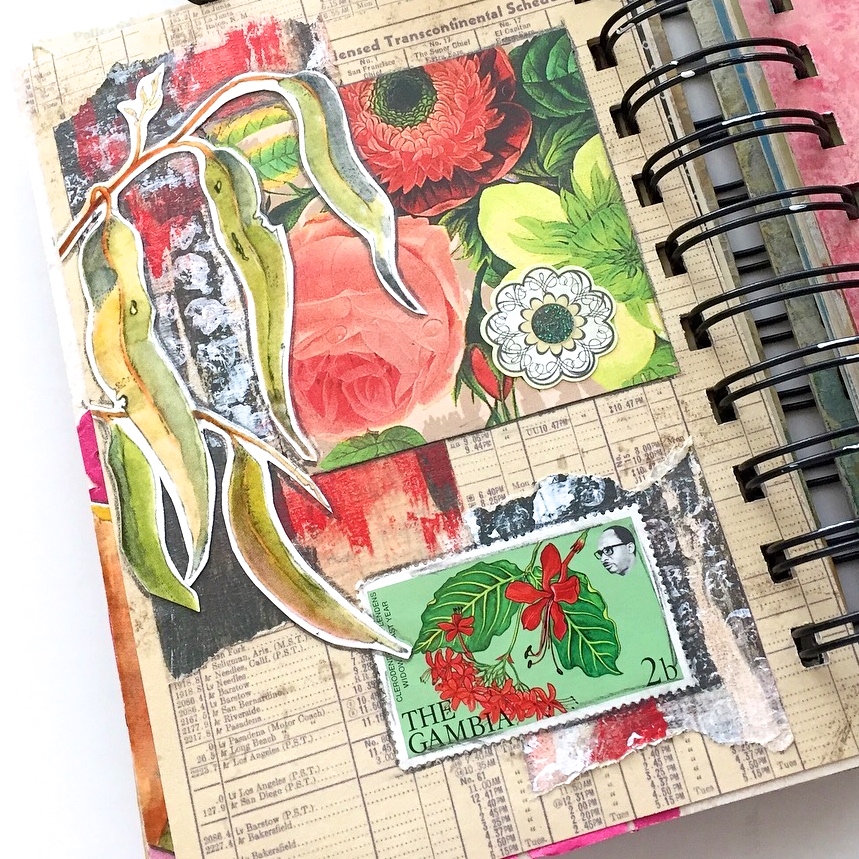
This journal is from a batch of mini art journals I made back in 2015. They were really popular, they may have to make a comeback.

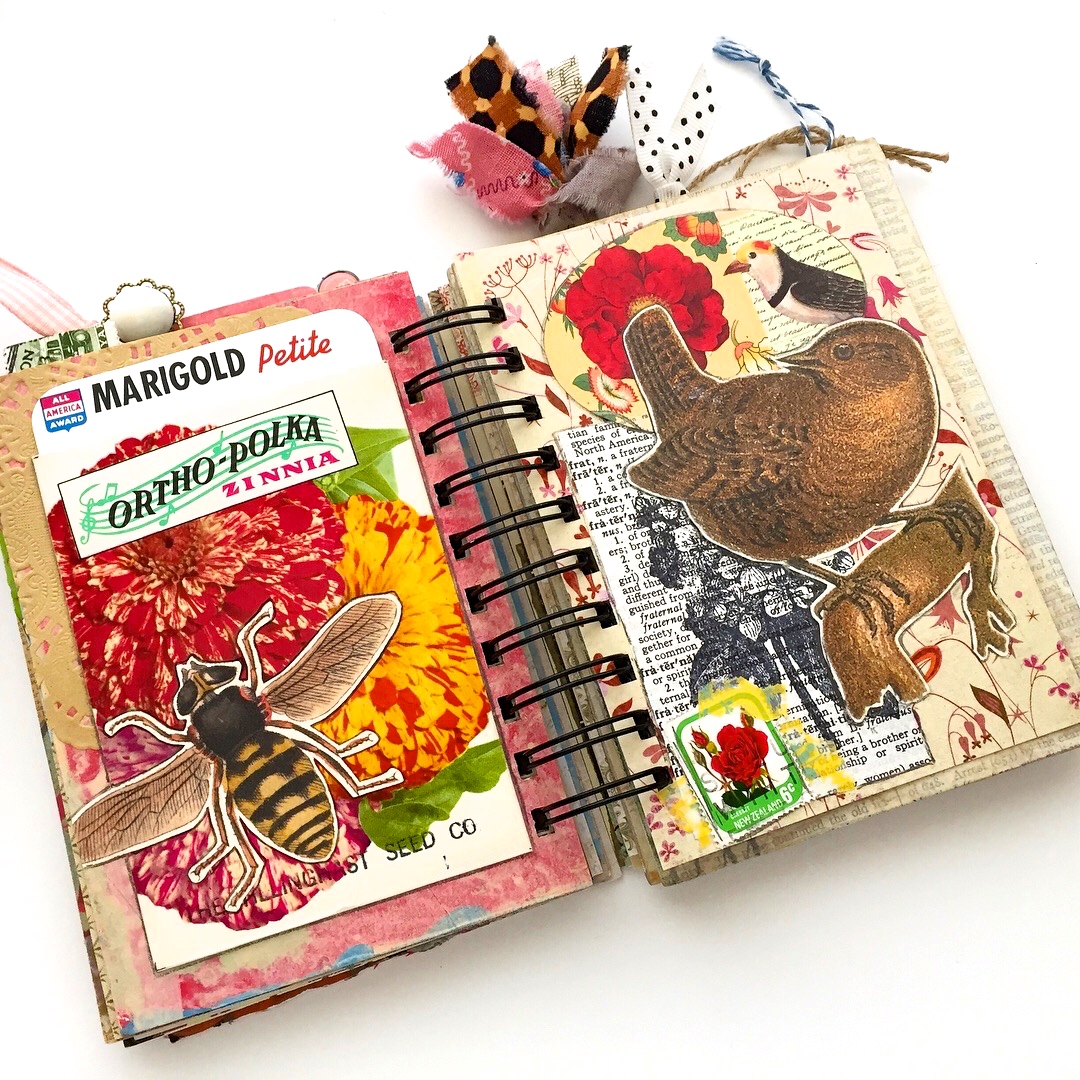
The final page spread. Time to move on…

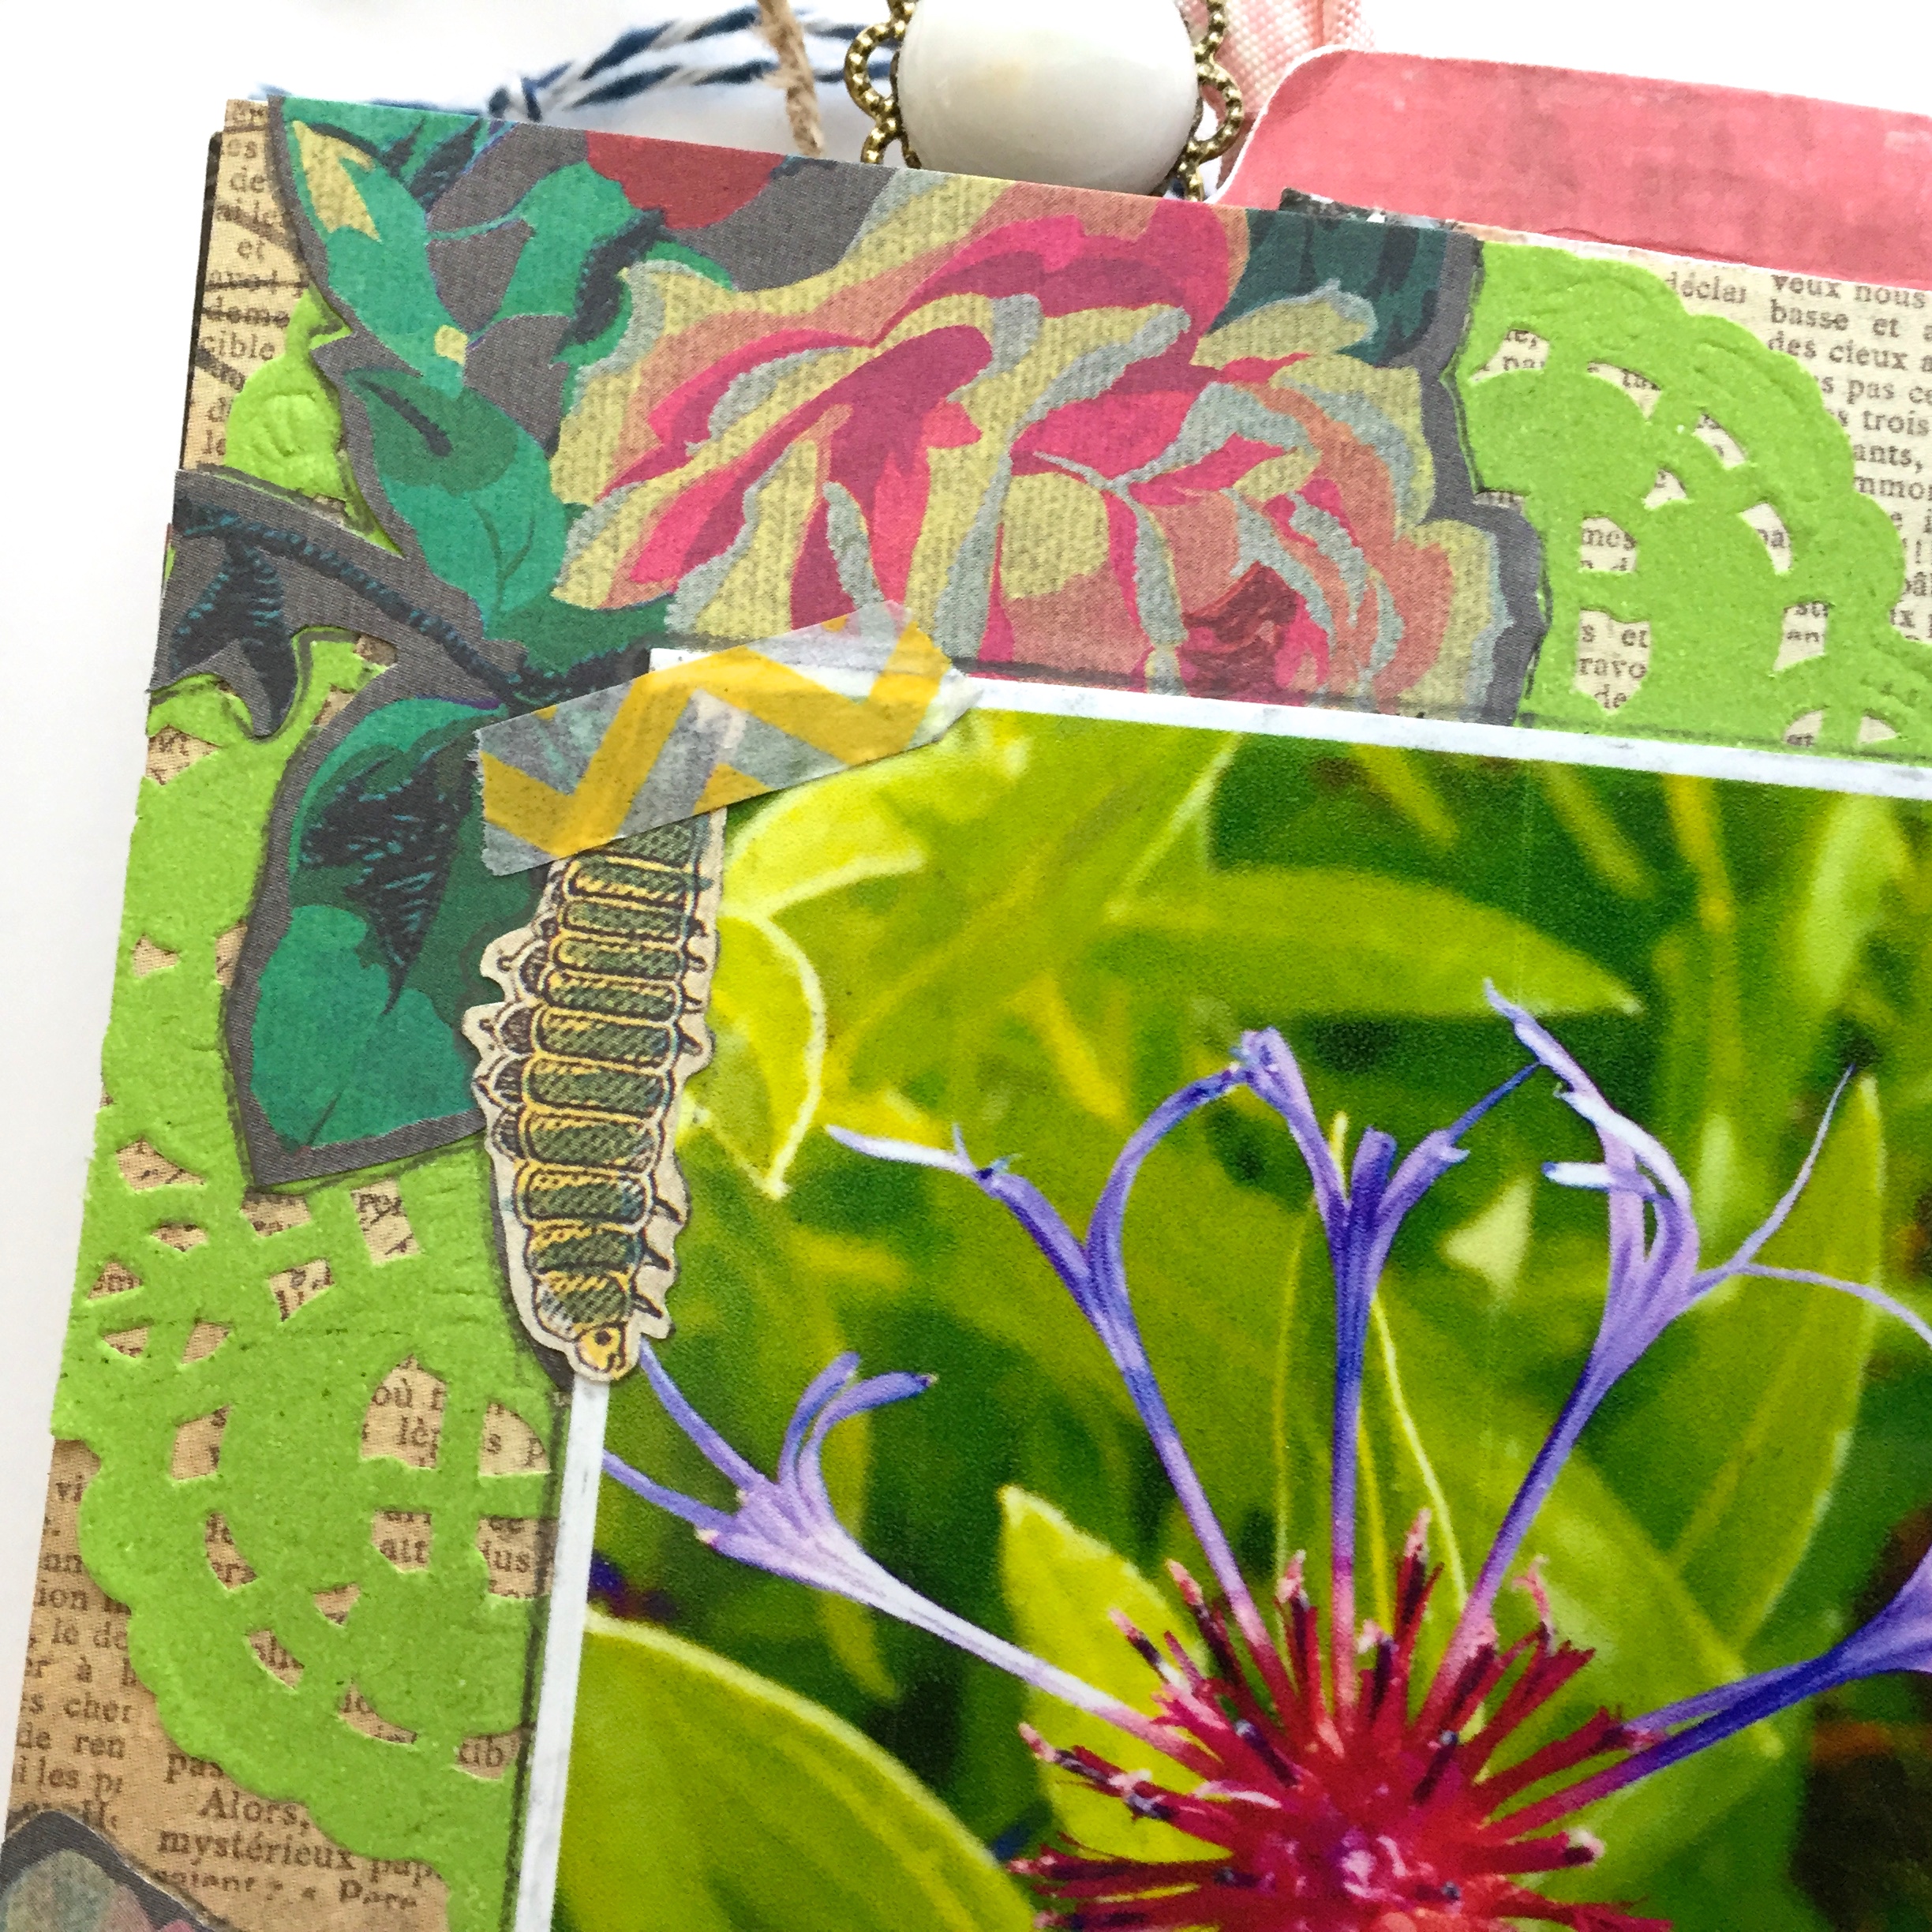
…but before I do that, I want to share the new ephemera packs this journal inspired me to make for my shoppe.

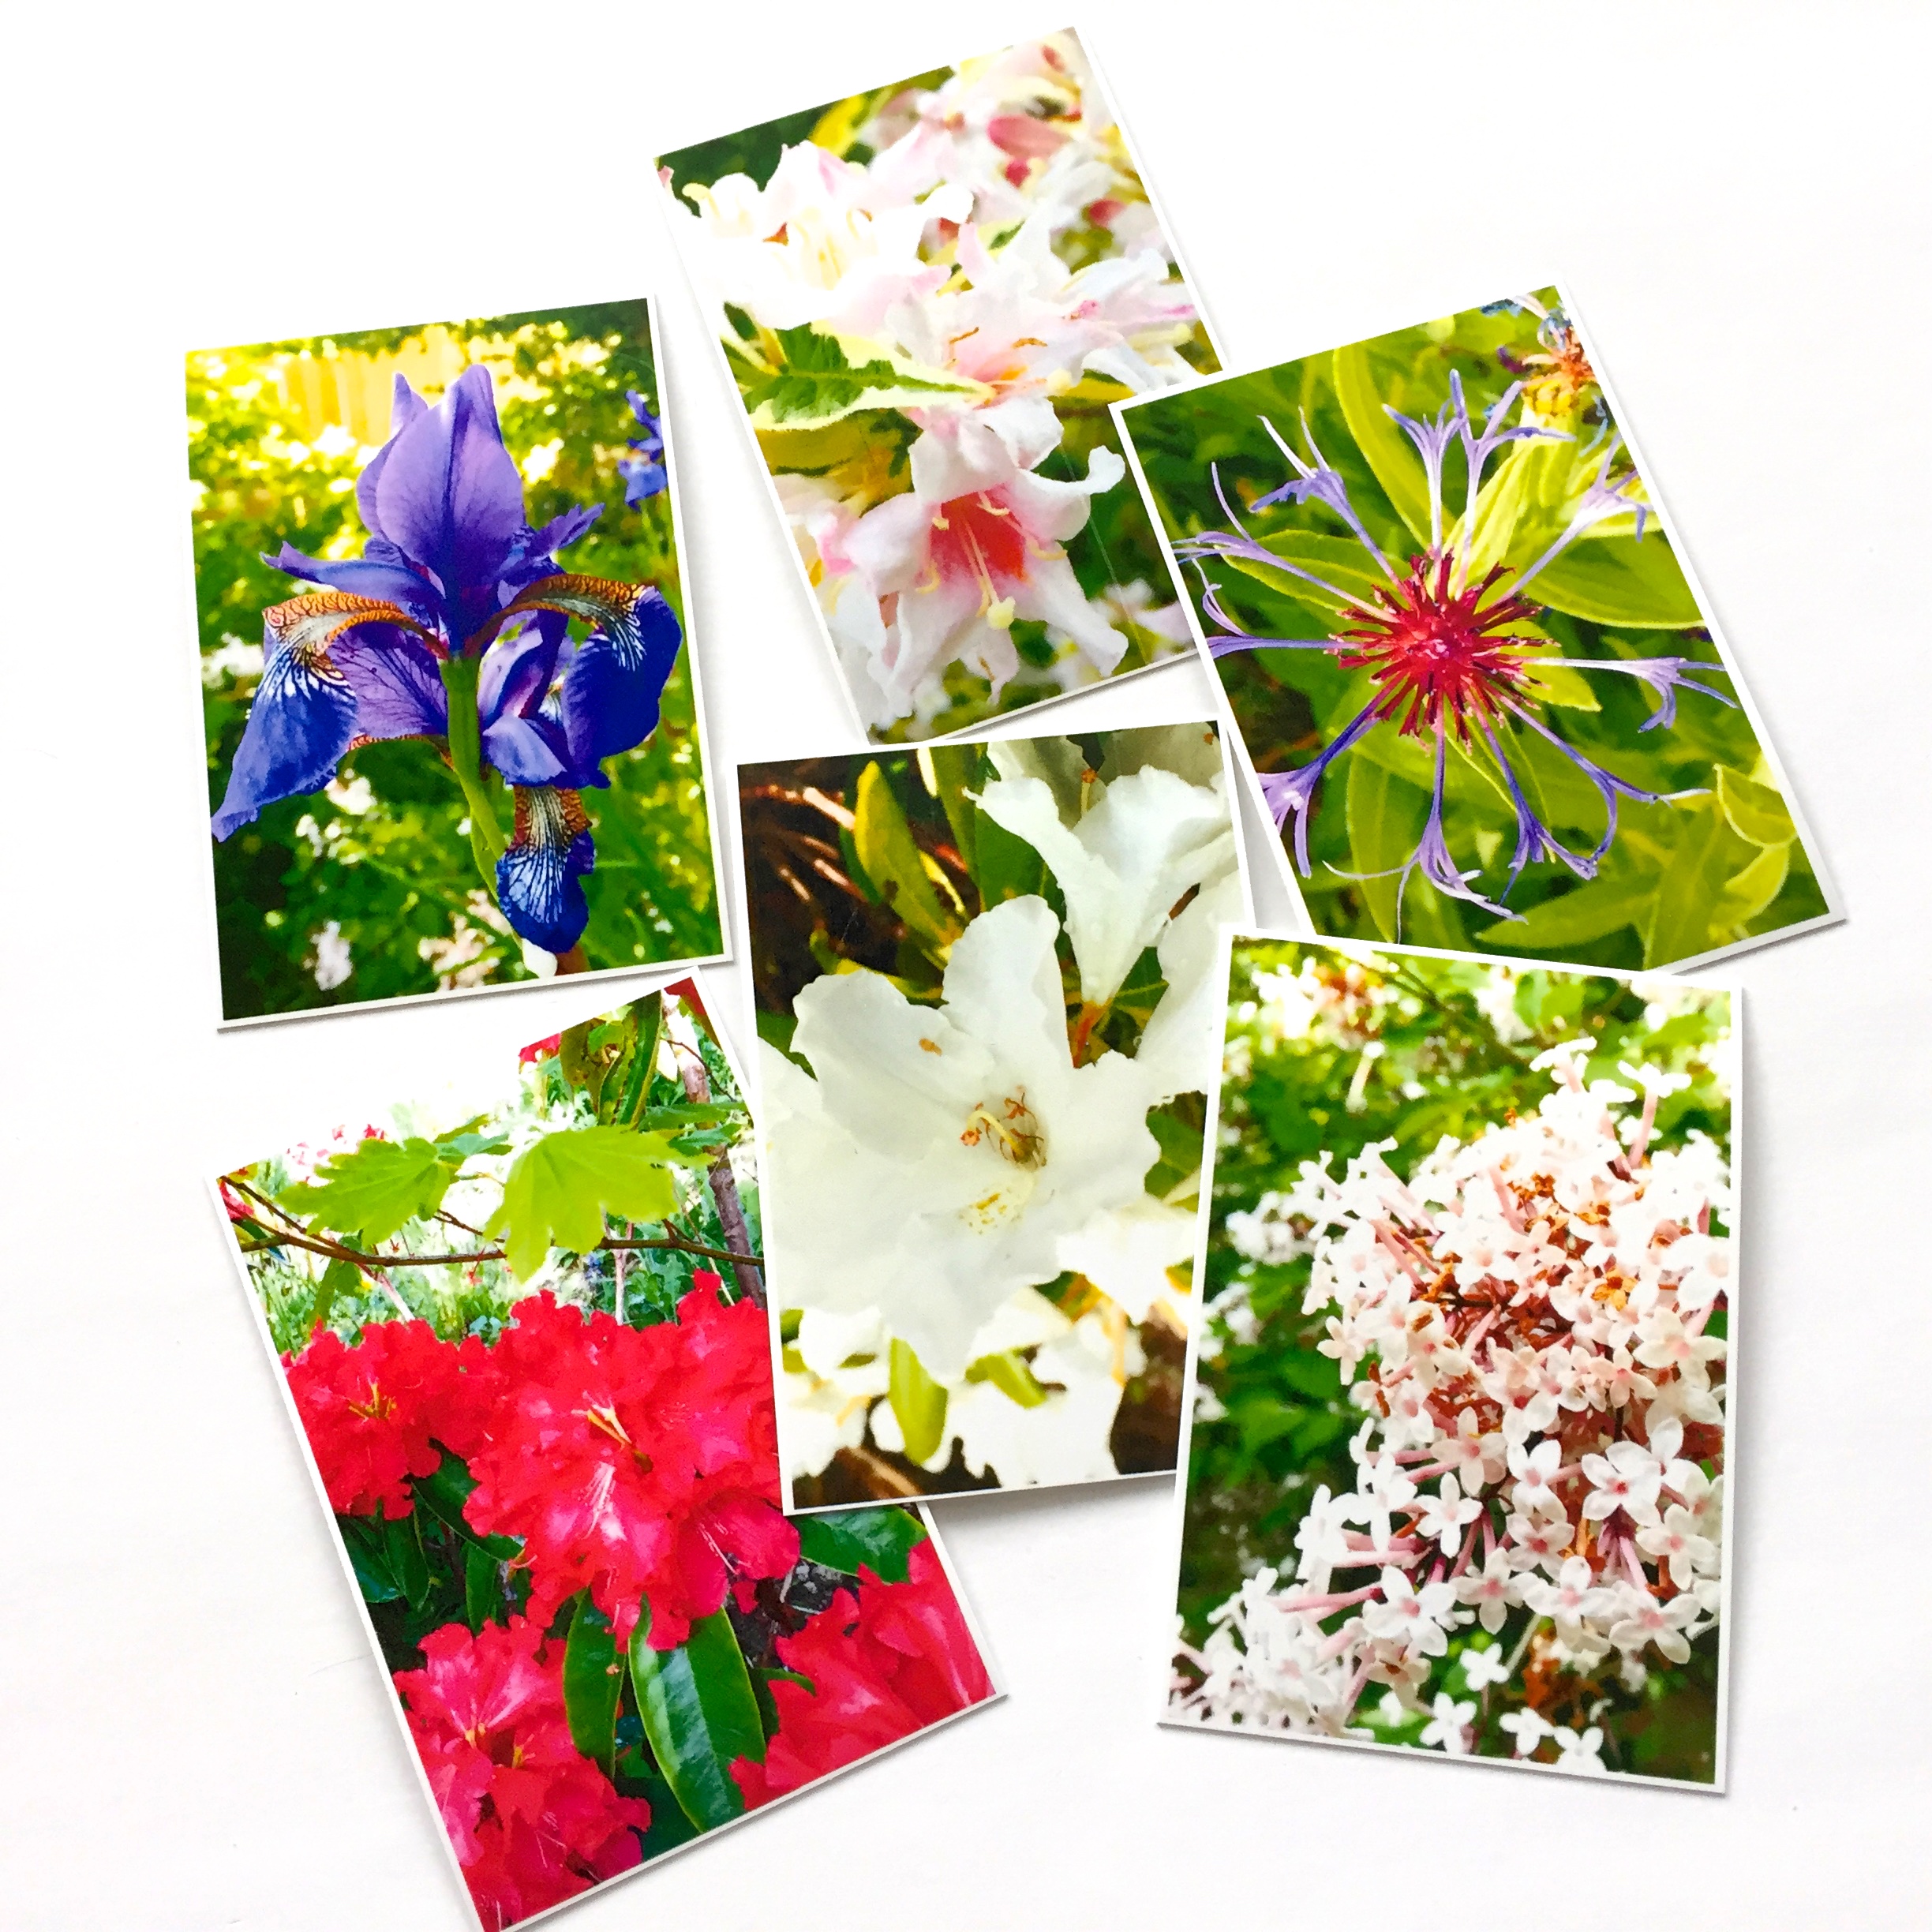
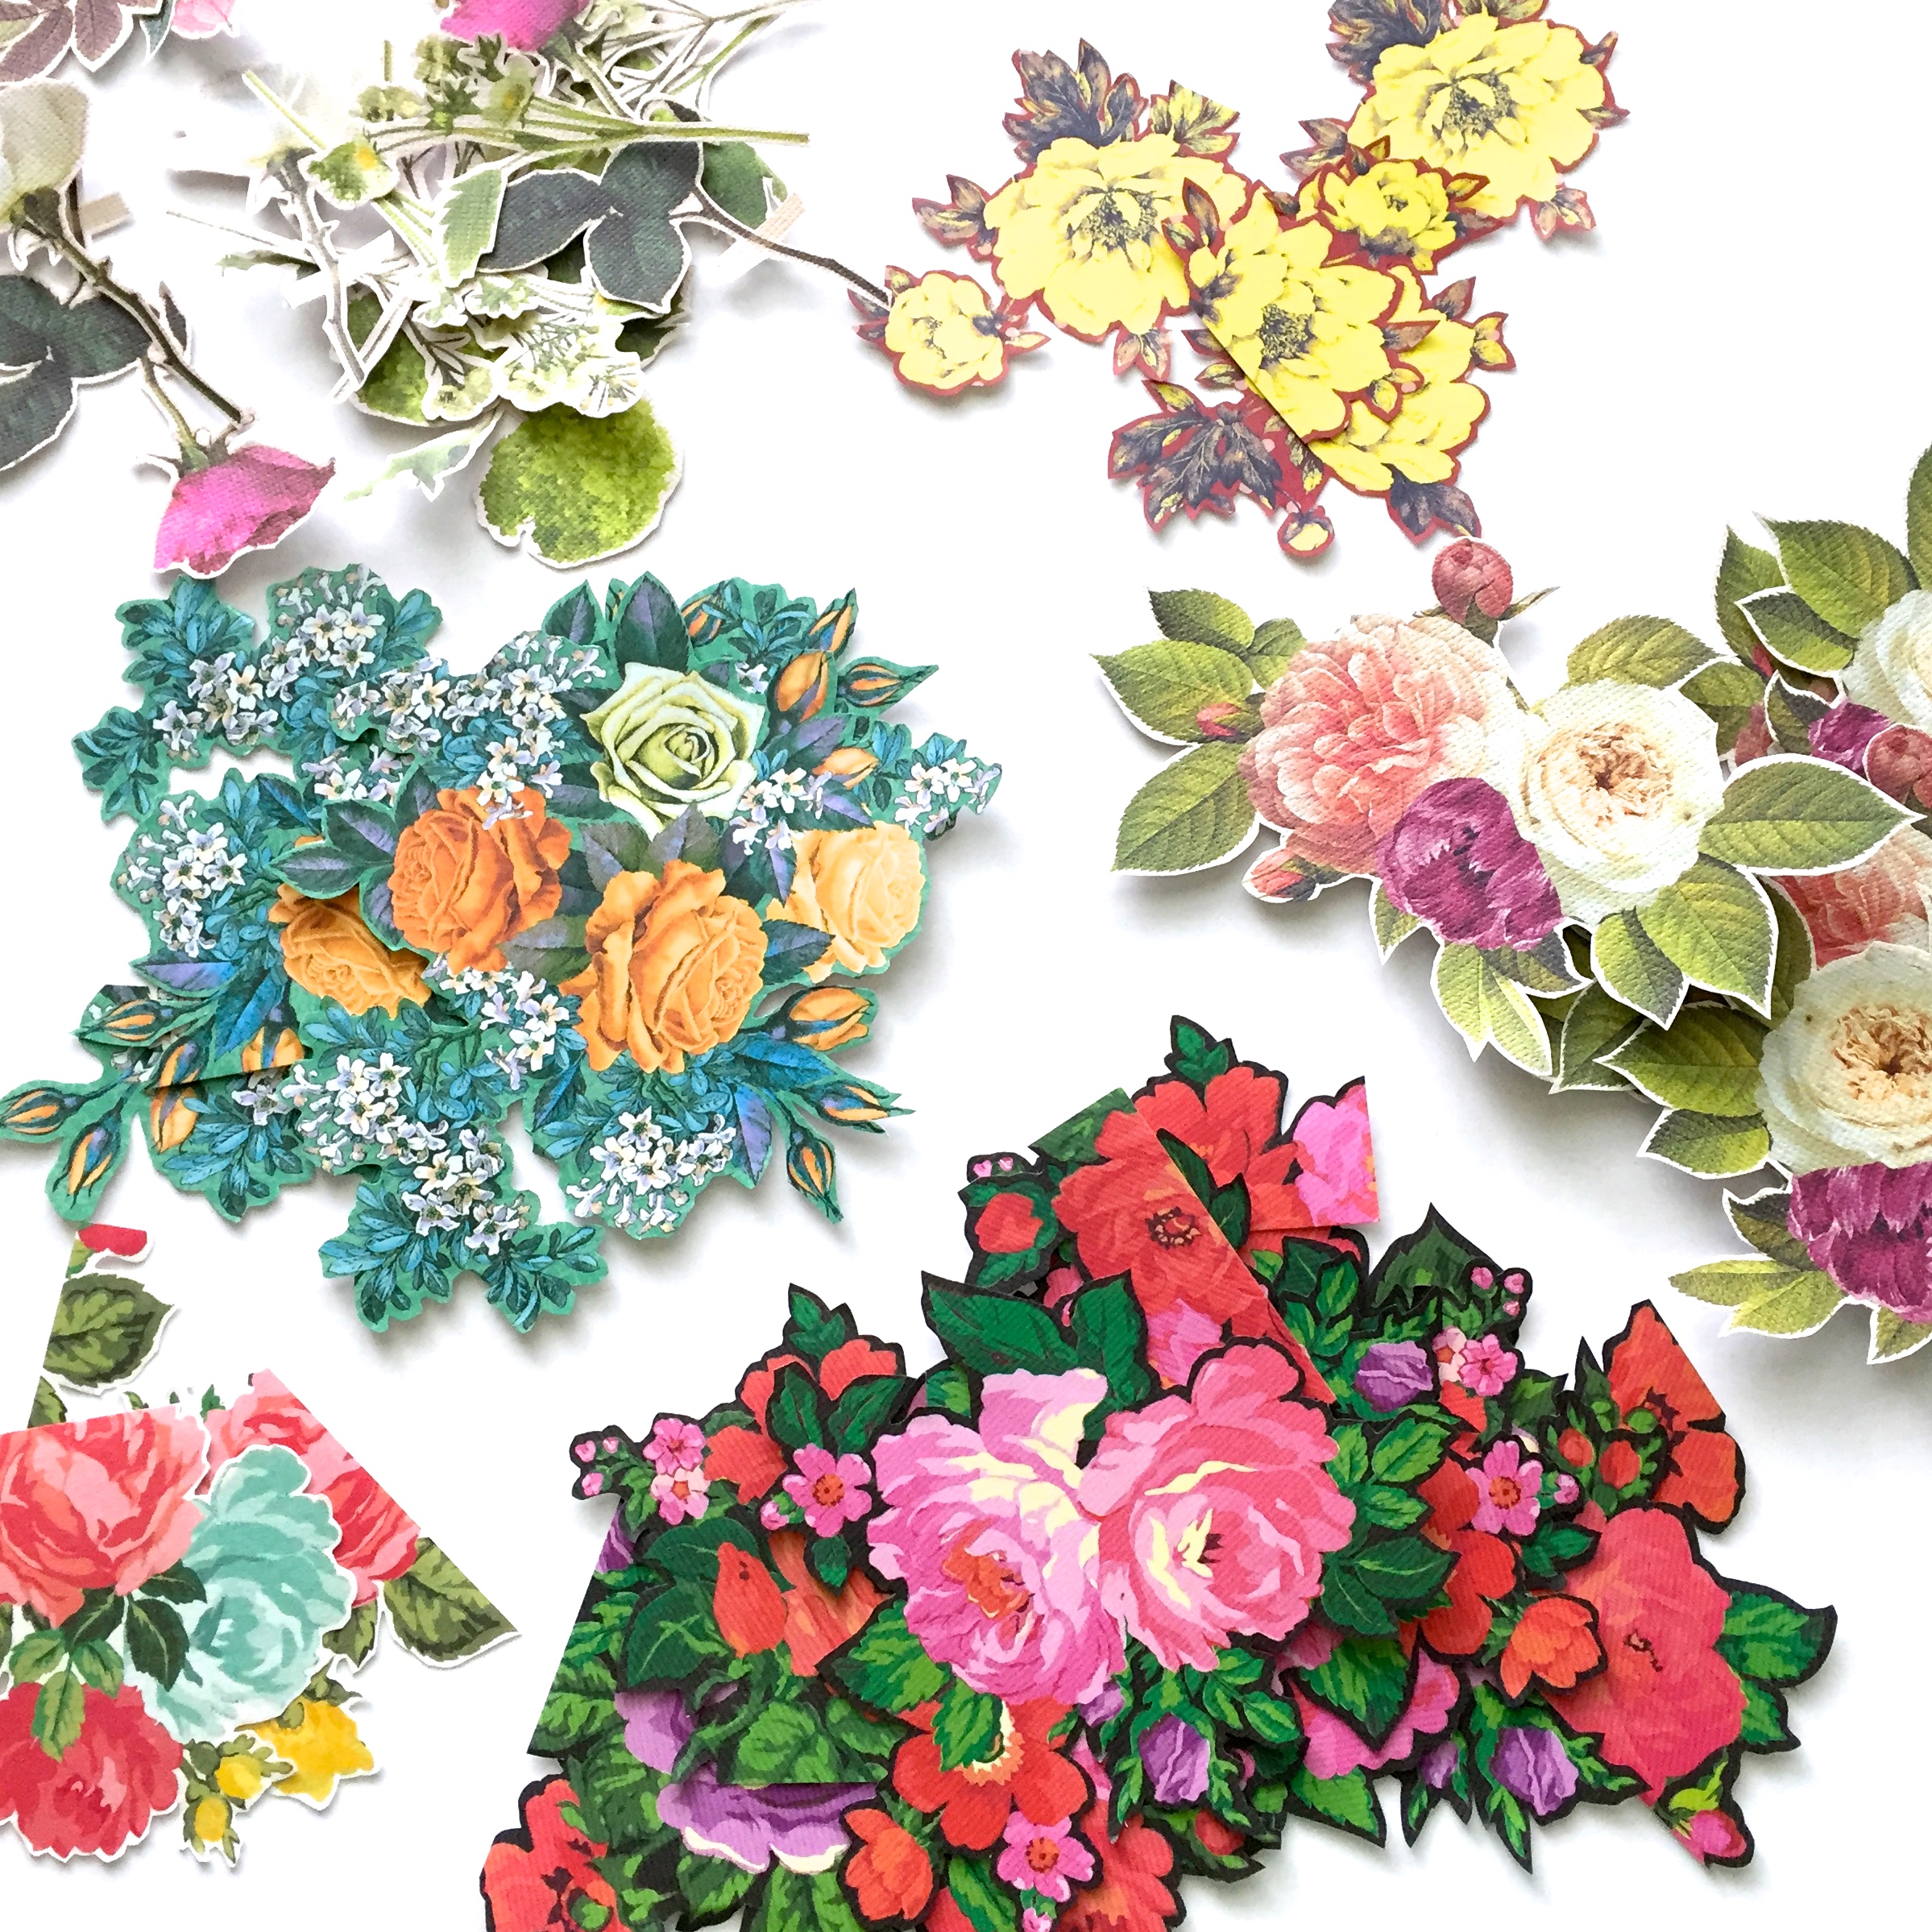
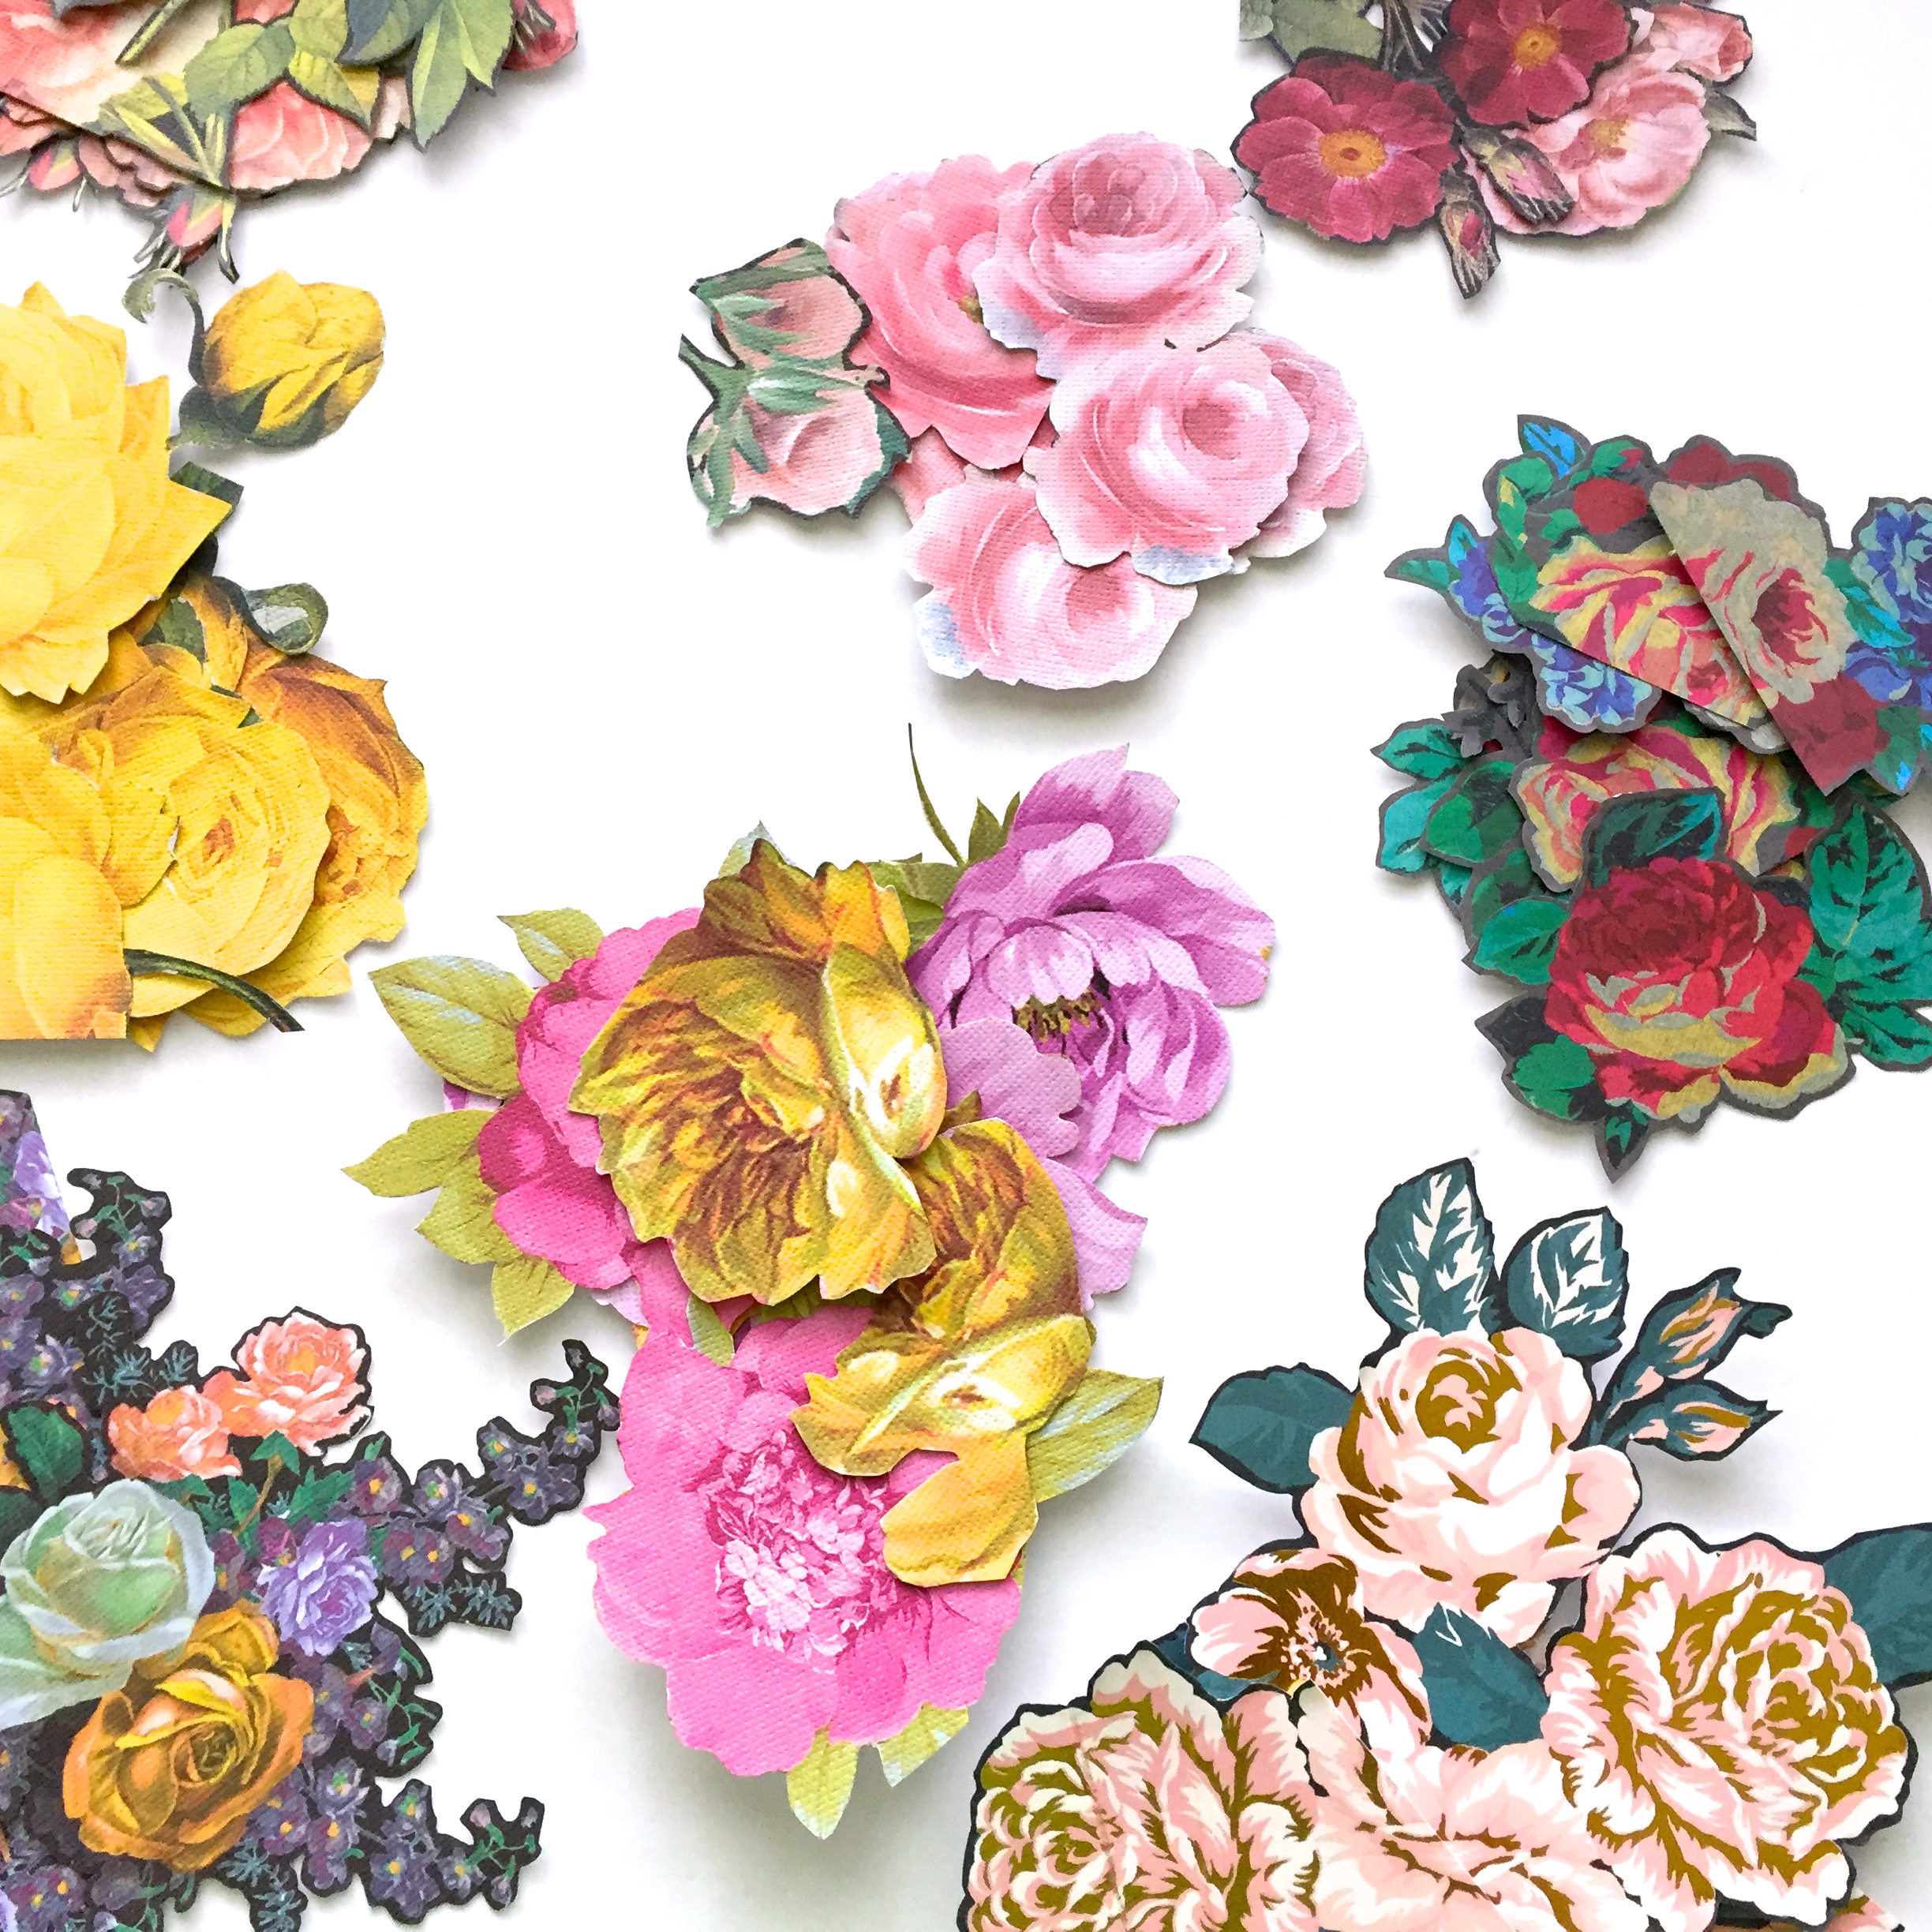
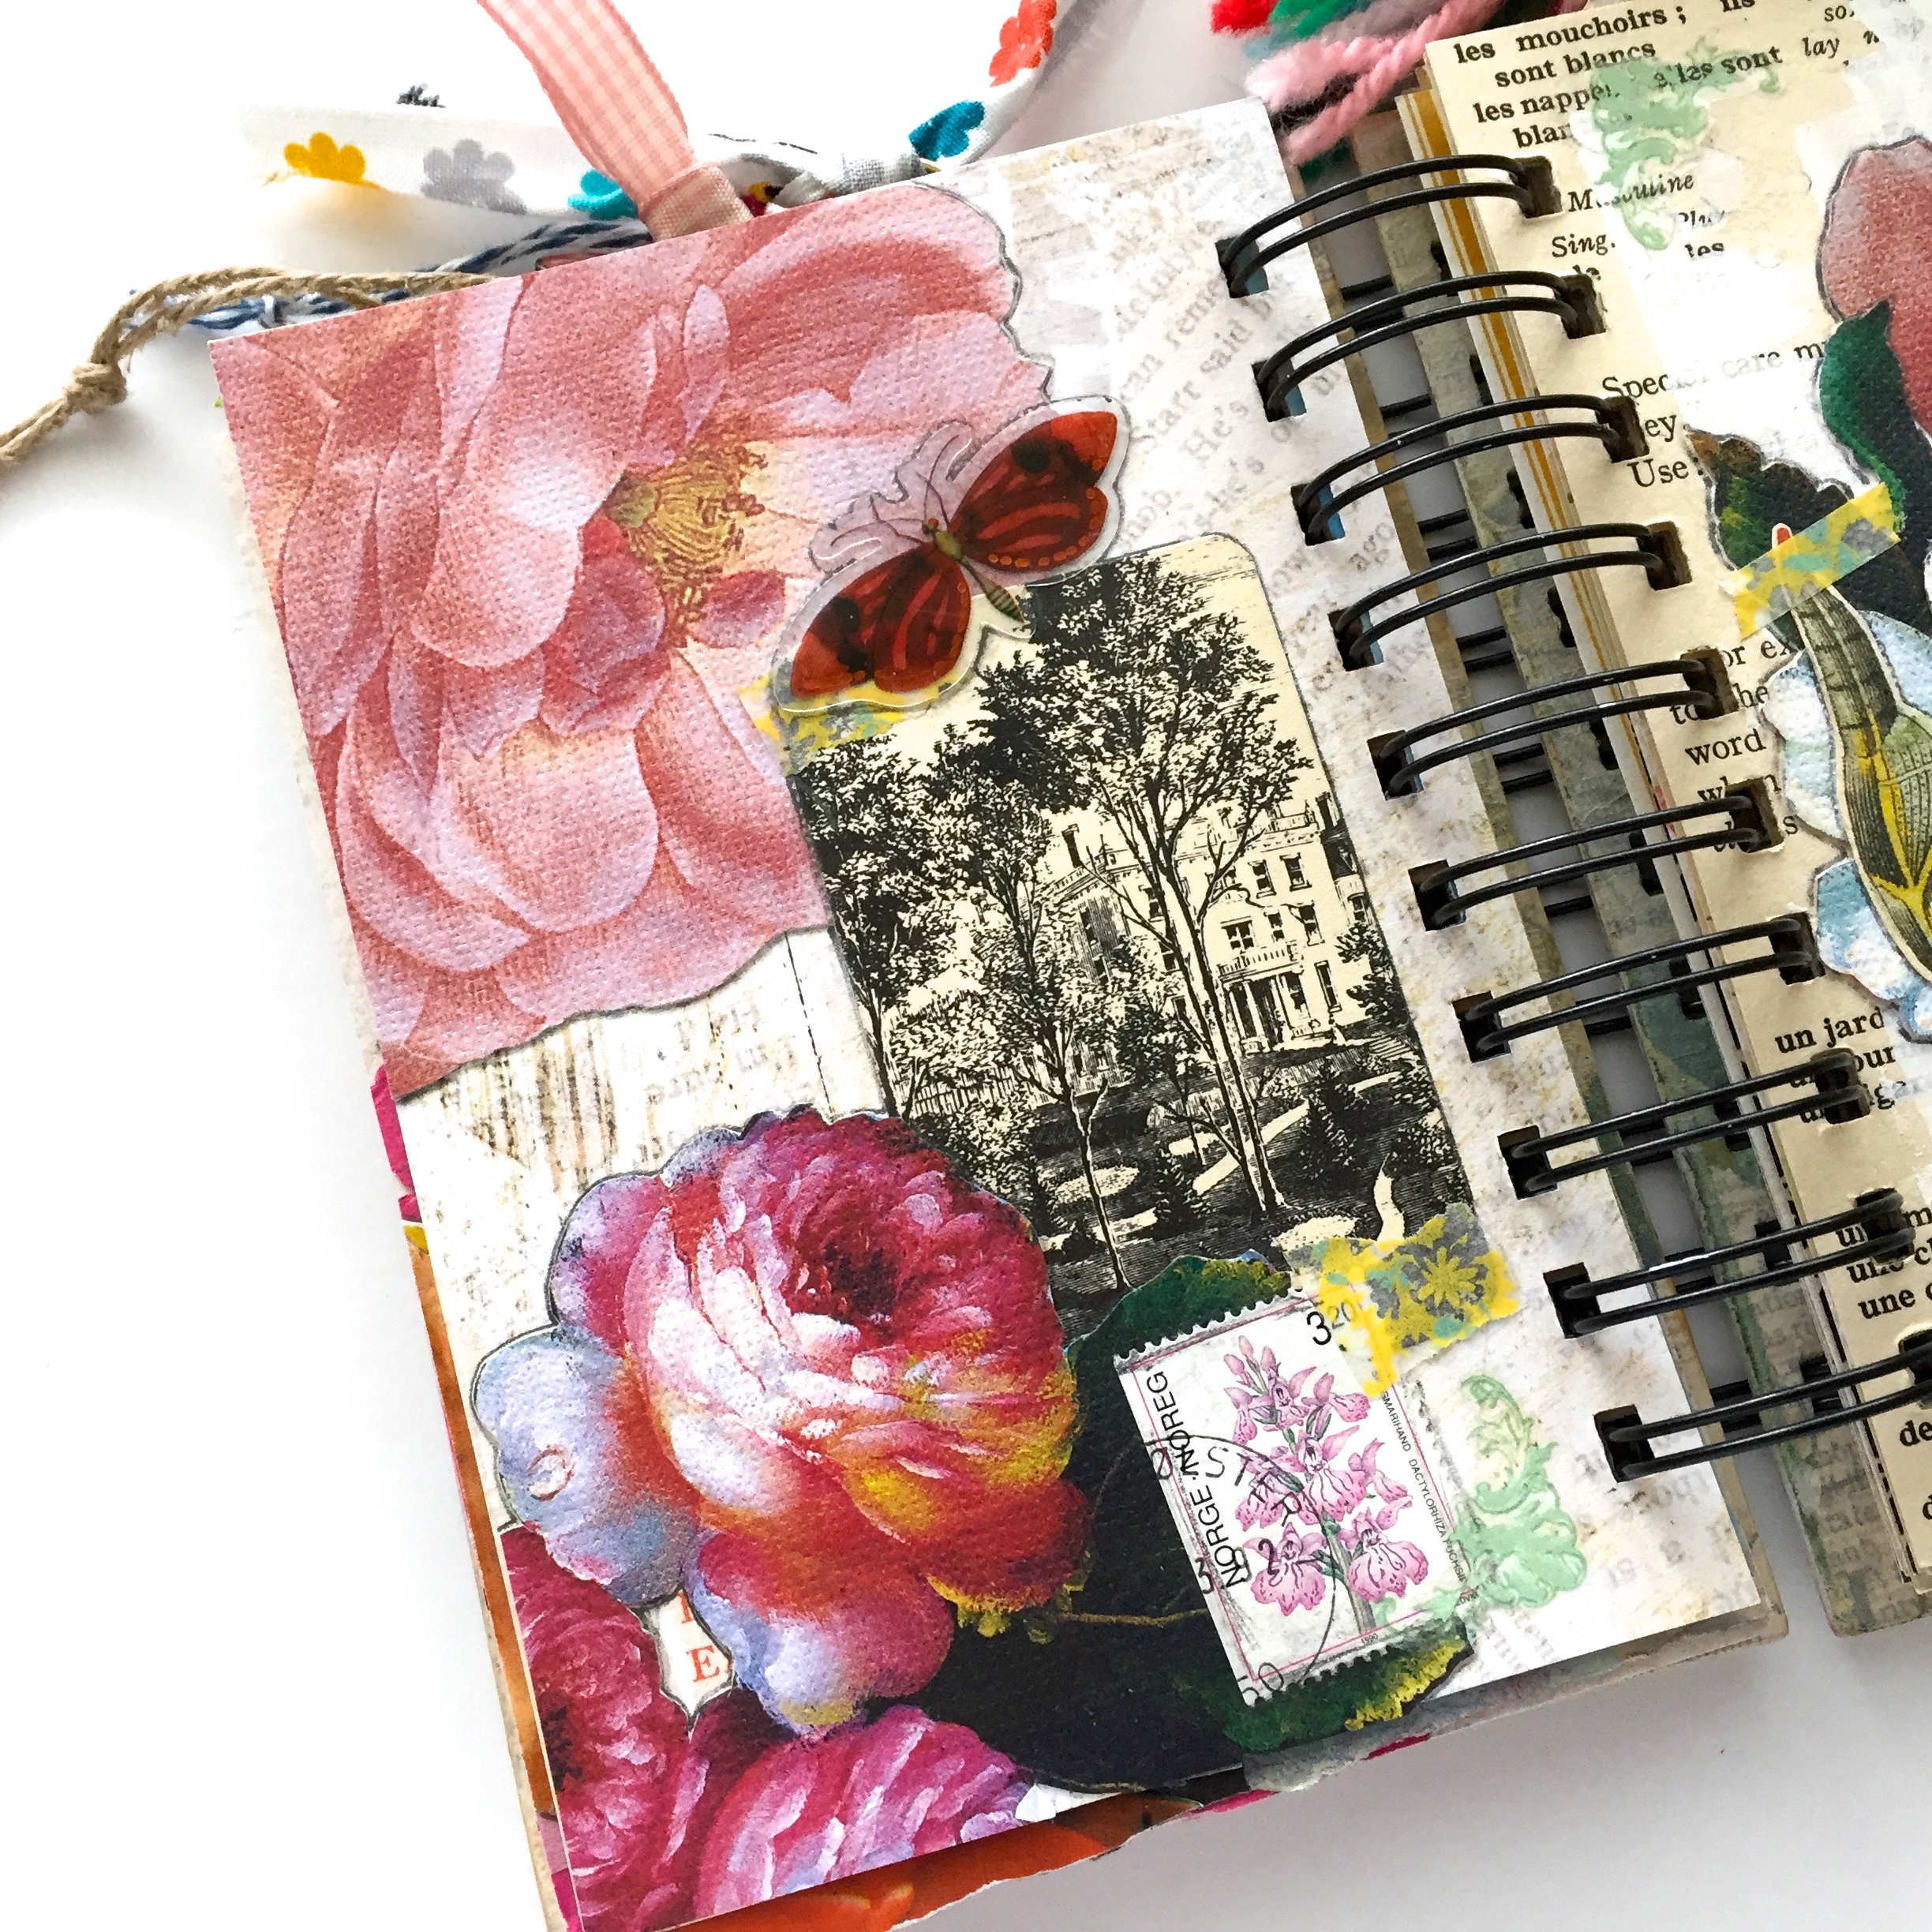
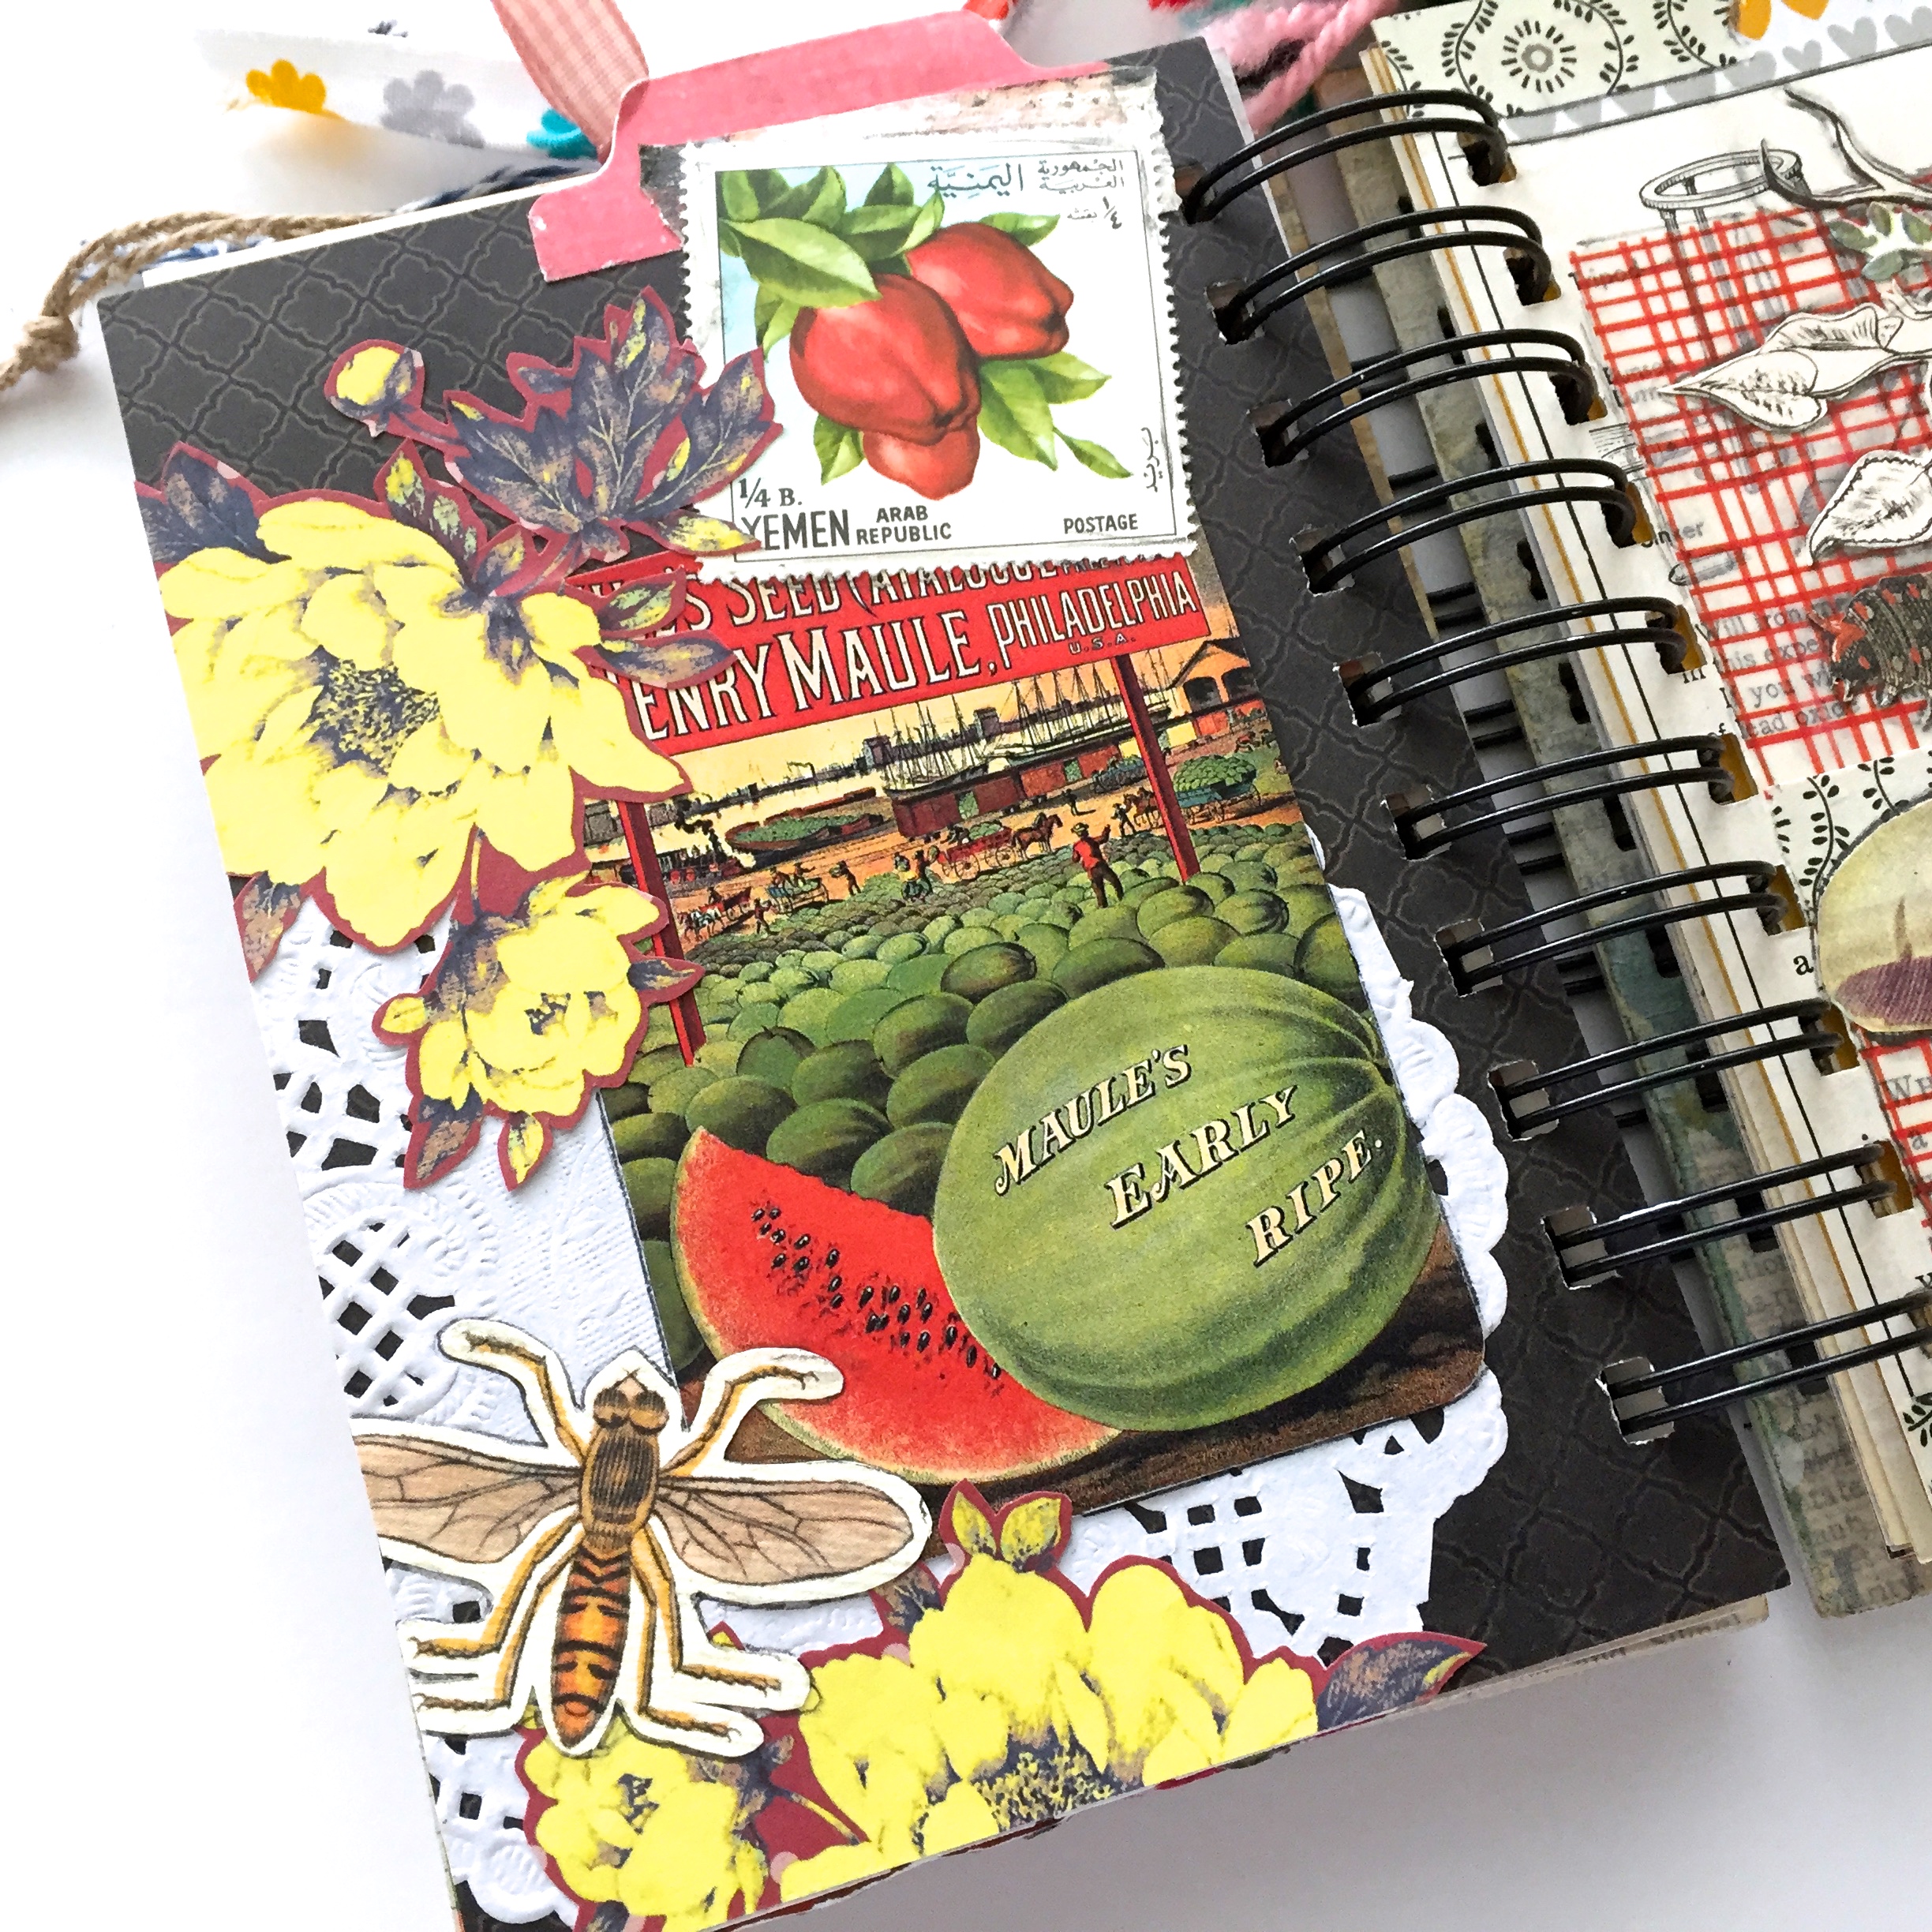
There’s a lot to take in here, flower cutouts (I cut way more than I’ll ever use), stamped images, floral postage stamps, vintage images from an old gardening book, birds…well, you get the idea.

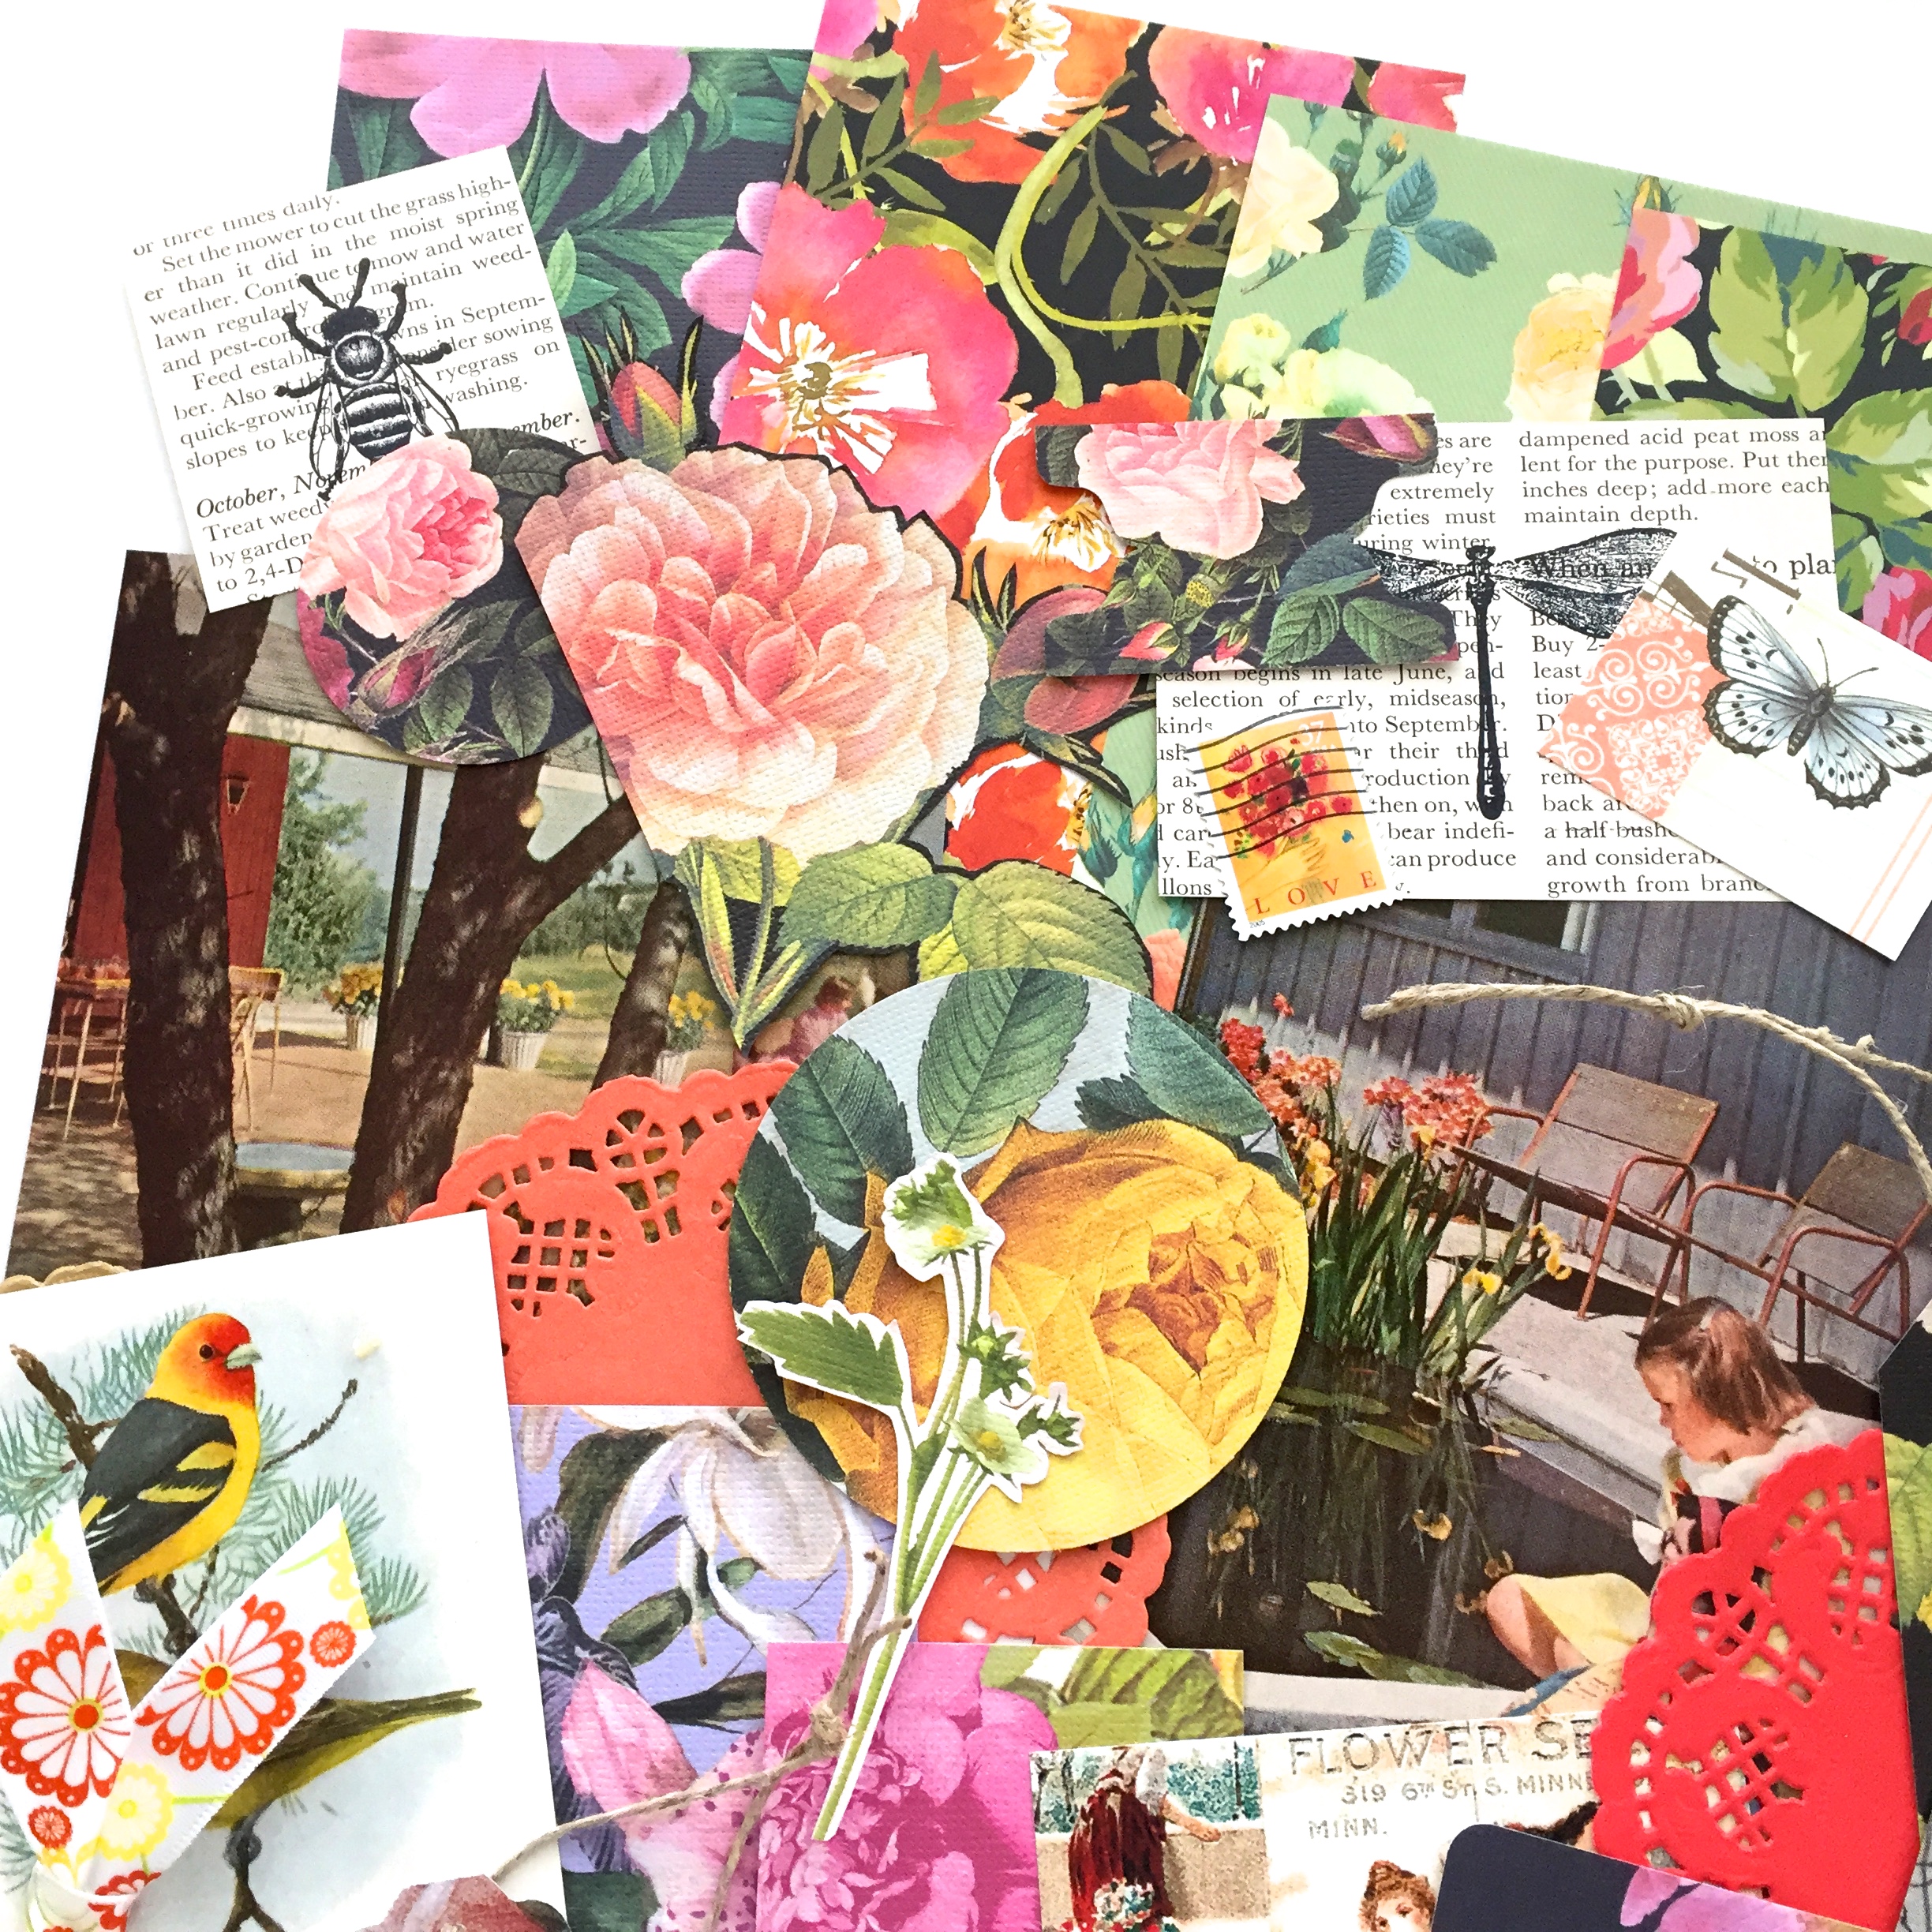
I think these are my favorite ephemera packs to date. I made 10 of them, so if you’d like to see more, pop over to my shoppe by hitting the link in my sidebar or go here.

I’ve struggled over the last week as to which “half-baked” art journal I want to jump back into for June, and I have finally chosen one. I’ll share more about that next time.

As always,

Thanks so much for stopping by,

Have a great weekend,

~Patty


Mini Art Journals In the Shoppe

Well, between weeding and replanting, I finally got around to making and listing some mini art journals. I love these mini art journals to use up some of the smaller bits that need a home.

I used the original book pages on all of these because they were so cute.

Case in point!

Of course lots of ephemera included.

And some of my painted pages. I kept them simple and just decorated over the white background.

Be sure to use the coupon code: CUSTOMERLOVE20 to receive 20% off your order!

There’s lots to look at, so pop on over to my shoppe when you get a chance! The link is in my sidebar, or here

Until next time,

Thanks for the visit,

Have a wonderful Memorial Day weekend,

~Patty

Garden (journal) Progress

This is the time of year that my garden seems to get the better of me. Thankfully, this year I got a jump start on my weeding. It’s still not perfect, but we’ve been able to enjoy the yard a bit more lately.

It’s still early days, but there a few blooms out there, so I decided to snap a few photos before they fade (disappear). And what better way to use photos of flowers but in my Garden Journal.

Believe it or not, I didn’t use the saturation when editing this photo, crazy! This Rhodie bush is in the way back of our garden, it’s finally big enough to see from the patio.

Here are some of the photo options I cropped and printed to fit in my mini garden journal. This is a great way to incorporate some memories into an art journal without journaling. But I will be adding the date.

 My Bachelors Button. I’m proud to say that he has given birth to many offspring which I will be relocating this weekend.

I was pretty excited to use these particular flower cut outs that I wrote about last week for this project, the colors were perfect.

These Irises really are beautiful, but I think it was the sunlight that took this shot to the next level. I didn’t need to do much editing on this photo, it’s a tad pixelated, but it’s not going to be entered into a photo contest.

There you have it, a peek into my garden. Adding photo memories to this little art journal has given me lots of ideas for future projects. They say a picture speaks a thousand words, so I’m sure this will translate to my next project beautifully, more on that in a couple of weeks.

I still have a few things to share about this journal that I will be talking about next week.

Until then,

Thank you for stopping by,

Have a great rest of your week,

~Patty

Flower Cuttings

Well, it looks like I have a new obsession..flower cutting.

And, I have to admit I’m quite chuffed at having figured out an inexpensive way to get lots of flowers…

Now, I’m sure lots of people have already figured this trick out, but it’s new to me. I was actually in my car, on another one of my adventures to find some kind of poster or ephemera pack full of flowers, in other words, spend more money, but I actually just turned the car around and went back home because…

…I had already bought tons of floral scrapbook paper the week before.

All I needed is was a good pair of scissors and some time. Can you imagine how many flowers one could get from a paper pad with a 40% off coupon? Mindblown!

All I need is a few images, an insect or two, and some glue, (and of course a postage stamp.)

I love how some of them have a dark background to give the flower contrast. If bits of the flower peal up a bit, I tuck a piece of ephemera under it, like it’s giving it a little hug. (how cute is that!)

These little yellow roses had a red background that really made them pop. There are so many options with these, cards, mail art, decoupage…

I’m just so tickled to have found an easy way to have tons of flowers on hand, I use the heck out of them. I may have to add these to my ephemera packs. let me know if you think that’s a good idea, okay.

Once again,

Thank you so much for the visit,

Have a great weekend,

~Patty

Painting Tape!

“Painting Tape”! Hmmm…sounds about as exciting as watching it dry. Well, I’m going to try to make it sound a little more interesting than that. I made some painted masking tape a couple of weeks ago, and I’ve been having so much fun with it, I decided to make some more. And I thought I might as well snap some photos along the way to share in case you might be interested.

So, here we go…

Ingredients: wide masking tape, acrylic paint in your choice of color, gesso (or white paint), bubble wrap, and a plastic card or putty knife.

Here is the layering process.

I used my grandson’s finger painting tray for this, which was a great idea, this made it super easy clean up.

I went back over the tape with a darker shade of pink with my finger tip just to add a little more color. One of the nicest surprises was that you can see through the tape in spots.

Here is a finished page using some of the tape. I like to tear it off then slice it thin like washi tape…

…or use it as a background piece. The great thing about this is that you can make it in any color scheme you want. I just tape it to the plastic containers I use to keep my ephemera in and it’s always right there where I need it.

(You can see a little more about my art journaling organization here.)

So, there you go, my latest obsession.

I finally feel like I’m getting back into the swing of things with my art journals. I need to stop questioning why I like arranging small bits on paper and just get to it!


As always,

Thanks for the visit,

Have a great weekend,

~Patty